Showing posts with label FO. Show all posts

Thursday, April 8, 2010

Simplicity 2942

Here it is...the aforementioned dress. In need of a bit of ironing :)

Pattern: Simplicity 2942 Dress, with no sleeves.


As I had noted in my previous post, the dress uses ties to achieve a waist (actually the ties were to be placed a few inches above the waist). This may have worked fine with a lighter fabric, but I was using a mediumweight (though still drapey) cotton plaid so it didn't work out very well. The dress didn't have any shape to it (even when I tied it) and the general fit was not quite right.

I recut the pattern starting at the armholes (taking about 1/2" fabric on each seam, so 1" total per side) and then came in a lot at the waist (probably took about 8" total of fabric off), I then shaped these changes down to the hem of the dress, to maintain a gradual A shape. I also omitted the ties.


Verdict: The pattern was easy to sew and I enjoyed it, however I probably wouldn't sew it again. I like the finished dress, and it fits a lot better now with the mods I made, but I just don't like it enough to sew it again! :) It turned out looking pretty good in the photos, but in person I still feel like something is a bit off. And that could just be that I don't like this style of dress on me, so don't be put off from trying this pattern, especially if you choose to use a fabric that drapes really well.


Monday, April 5, 2010

FO: Audrey

So I finally got FO photos for Audrey :) I ended up wearing it this weekend, so it wasn't until after I got photos that I realized I had meant to photo it over the dress I just finished sewing! Oops.


Anyway, this was such a fun knit. It's already seen quite a bit of wear as well. The only mod (excepting a few other minor things) was that I knit this to pattern gauge with a laceweight rather than a sportweight yarn. Knit Picks Alpaca Cloud is great to work with, it's a very fine and soft laceweight. I love the fabric I got with the gauge/yarn combo, but after seeing how it's wearing, I don't think I'd do it again.
Of course I'm still planning on finishing this one (with merino laceweight), so I guess I shouldn't speak so soon!

One of the other troubles with this fabric is that it doesn't have enough structure to hold up under closing the buttons. I chose the 30.5" size (to fit 33") and I'm really happy with the way it fits (my gauge was a tad off, so the measurements are a bit larger than the pattern...31.25" I believe, but I'd have to block it again to check). If I had knit this with a sportweight, the negative ease would be perfect, but since they pull badly with this combo, I'm sticking to leaving it as an open cardi. Which is fine, since I love it that way.

One of the few troubles I had with the pattern (which I believe was directly related to my yarn choice) was the twisted ribbing. It looks great on the finished sweater, but I never quite got the hang of purling through the back loop. Needless to say, it was slowwwww going!

Overall, I highly recommend this pattern, it was very easy to follow and so great to knit. I'm constantly envisioning more versions with other yarns. :)

Tuesday, March 9, 2010

FO: Olympic Blues

Yikes, I haven't blogged in quite a while! It's been a very busy last few weeks, but thankfully things are slowing down again so I have some time to write a bit.


As you Ravelers will know, I finished my Olympic Blues cardigan within the time limit and was very happy to have done so! It was certainly a lot of knitting!


Knitting Olympics Medal
Overall, I'm not entirely thrilled with this project. At first when I tried it on, I loved it. But after a quick peek in the mirror, I was a bit disillusioned. The drape of the cardigan makes it sortof swing out around the body, which means any waist I have disappears and so it accents my hips.

I think I'd like to try this with a belt, because I prefer the way it looks when pulled around more like a blazer shape. If I ever purchase a belt (finding a cute one that fits my waist is a challenge...they're all too big to wear at that point!) I'll get some more photos to show you what it looks like. Otherwise, I may consider adding a button closure with a crocheted button loop.

Ok, sorry! Now for the positive!

The yarn is pretty nice, it blocked soft and drapey and is fairly comfortable to wear. I like the stitch pattern and the sweater is cozy to wear (though the construction tends to make it feel like it may fall off my shoulders) so I know I'll get use from it. And of course, since I finished it in 17 days I don't feel like I wasted eons of knitting on it! Even though I sort of did...I just don't feel like I did. ;)

Thursday, December 31, 2009

FO: Christmas Tree Scarf

2009 Christmas gift for my mom.
Even though I had to race to finish this (I think I had it blocking Dec 23rd?) I enjoyed this project a lot. This is one lace patterned scarf I can see myself knitting again.


Ravelry Project Link

When I first began knitting, I realized that this pattern looked a little like Christmas trees, especially when taking the green yarn into account! I still liked it (and knew that the five knit rows per pattern repeat would be an asset to finishing in time) so I continued on. I knit two strands of Knit Picks Gloss Lace together to get a fingering weight yarn and I subtracted one pattern repeat (width-wise) from the pattern to end up with a 8" wide scarf. I was surprised by how much the yarn grew after blocking the entire scarf. It ended up growing nearly 15" lengthwise (finished dimensions 8"x65").

Overall, very happy with this scarf. And mom liked it too. :)

And thanks again to my sis for modeling!

FO: Slouch and Pebble Cowl

A couple more 2009 FOs. Both of these have been finished for quite some time (though it was just recently that I put buttons on the cowl).

1. Pebble Cowl. Mmm, mindless knitting. Just a seedstitch pattern with an added buttonband (because I realized that the cowl was going to be too small). The cowl has five buttons total, it seems to be easier to wear when three of the buttons are left open however, so I don't think I'd do so many again!

2. Slouch
This was a fun project to knit, and overall I like the hat, but I think I might like a beret better, maybe something more like this beautiful project from Celestial.


Thanks to my sister for modeling (hehe, I roped her into it after she agreed to model items that I actually made for her!)

Wednesday, December 30, 2009

FO: Kathmandu Hat and Mittens

My first actual project with this yarn (though I had several failed swatches as well) was a feather-and-fan lace scarf. It didn't go very well. The Kathmandu Tweed yarn doesn't have much stitch definition at all, so while I loved knitting the scarf, I really didn't like the way it looked. I finally put the scarf away and decided to take the yarn out again if I came up with a better idea. A few days into December, I finally thought of something. A pair of simple stockinette mittens. Knitting up at 4sts to an inch, the mittens fairly flew off my needles and I was done knitting within just a few days. After finishing the mittens, I had an entire skein of yarn left so I decided to knit up a matching hat. I started with a 1x1 ribbed band, which I grafted together and then picked up sts around the band to knit the crown of the hat. This is my favorite way to knit a hat, even if it does involve grafting! I believe I finished this entire set in about a week. I gifted these to my sister for Christmas and I'm happy to say that she loves them! (She's modeling them in the photos).

Sunday, December 27, 2009

FO: NHM #7

Ravelry Project Link


I was so glad when I finished knitting these mittens! I started with my row gauge too small thinking that I'd just re-chart the tips of the mittens if they ended up too short. Not as easy as I thought it would be at all! I also had to spend quite a bit of time working out the thumbs. The back of the thumb is left uncharted in the Selbuvotter book, so I worked it out in Microsoft Excel along with the front of the thumb which I edited from the original (in the original, the middle diamond is solid and split down the middle).


Once I finally got the tips and thumbs re-charted and knit up, I was happy with the way these mittens fit me, but I still wasn't sure how they would fit the recipient. Luckily when I gifted them I found that they not only fit perfectly, but the recipient loved them. Yay!

Saturday, December 26, 2009

Merry Christmas!

I hope everyone had a wonderful Christmas!
Though the giant snowstorm over Christmas Eve and Christmas Day complicated travel plans a bit, it was still a great holiday.
I did a little work in the kitchen:
Chex Mix from the Pioneer Woman Yum.
Made some more Christmas cookies. Decorated by holiday guests.


And I still have great plans for this Caramel Corn Recipe, but didn't get around to it for Christmas. Maybe New Year's Day?

And now that I've gifted all my hand-knits I'll be able to share details and photos throughout the week. This hat will be the first:

Made this in September from Knit Picks MerinoStyle yarn,. Gifted to my brother for Christmas. He liked it. :)

Saturday, December 12, 2009

February Baby Sweater

Ravelry Project Link

This little baby sweater was such a fun knit. I wish I could have knit it in wool, but I had to make sure it was machine washable/dryable so Berroco Comfort Baby it was.

My favorite part of the sweater ironically ended up being something I'd done unintentionally. Elizabeth Zimmerman only mentions knitting buttonholes after she instructs knitting about 1.5" of the yoke, and because I didn't read ahead, I completely missed that instruction until it was too late to add knitted-in buttonholes. As you can see, what I did here was crochet one row across the garter yoke edge and then crochet another row adding three buttonholes (I chained three per buttonhole). I love the way it turned out.


Because I had to modify the pattern to work out an appropriate size with my tighter gauge, the division for the sleeves/fronts/back didn't work out exactly right. The sweater will still fit a baby, it just doesn't lay correctly because the fronts together are wider than the back.
I also knit the sleeves in the round, which was a lot quicker than the seaming method. Overall, I loved this project, even if I was knitting with acrylic!

Sunday, November 1, 2009

Francis Revisited-Mods

Disclaimer: In order to make sense of these notes, you’ll probably need to have some familiarity with the “top down raglan” sweater construction. My notes might be a little confusing otherwise, since I didn’t take a lot of notes with this sweater, just enough so that I could repeat the knit later on if I wanted to.

When I began looking at the Francis pattern, I knew immediately that I didn’t want to knit at the large gauge suggested. I made several gauge swatches with my yarn (Patons Classic Merino, a worsted weight) and decided to go with about 5 sts per inch. After I began knitting the actual sweater I realized my gauge had become a looser 4.5 sts per inch, so I ripped the sweater and adjusted my calculations accordingly. Thus, all notes below are for my sweater knit at 4.5sts per inch. As for row gauge, I have 6 rows per inch written on my notes, but I didn't double check that after I began knitting.

Ease:

I ended up with about 1.5” of neg ease around the bust (sweater measures 31.5 at that point) and 2” of positive ease around the waist (sweater measures about 30” at that point).


The Pattern Mods:

I cast on 112 sts and divided them as follows:
40sts for front
2 sts for between increases (the sts that I increased on either side of)
12 sts for sleeve 1
2 sts between increases
40sts for back
2sts between increases
12sts for sleeve 2
2sts between increases

Raglan Increases:
I increased using a “make 1” increase on each side of each 2st increase column. So I increased 8sts each increase round. I knit two plain round and then did an increase round, I prefer the look of a steeper increase slope, but in order to adjust to the large neck opening necessary for the cowl I did the increases every two rows.

Side note: If I were to knit this sweater again, I would change the cast on ratio of front/back/sleeve stitch counts. For this sweater, by the time I was ready to put the sleeves on stitch holders and begin knitting just the front and back, the sleeves were still too small while the front/back sections were growing too large. I would probably subtract about 5sts from the front and 5sts from the back cast on section and add somewhere from 2-4 into the sleeve sections.

I knit in this increase pattern until the sweater measured 6.5”
Stitch counts (not including the 2 sts increase columns, or so my notes read):
Sleeve: 38sts
Front: 66 sts
Back: 66sts

When I removed the sleeve sts to st holders, I added one st from each "two st increase column" on either side of the sleeve (so each sleeve had one st added to each side of it, 40 sts). I also cast on two sts after removing the sleeve stitches to the needles.

Knitting the Front and Back:

Knit until top measures 4.25 from underarm cast on (the sts I cast on in place of the sleeves).
Work decrease row. (decrease 4 sts evenly placed on the sides of the sweater)
Knit until sweater measures 5.5” from underarm cast on.
Work decrease row.
Knit until top measures 9.5” from underarm cast on.
Work increase row. (increase 4 sts evenly placed on the sides of the sweater)
Knit until top measures 11” from underarm cast on.
Work increase row.

At this point my notes disappear. But I continued knitting plain (no more shaping) until the sweater was about 3” shorter than I wanted, and then I worked 3” of 1x1 rib and finished off with a tubular bind off.

Sleeves:

I cast on two sts for the underarm of each sleeve (42sts) and knit until the sleeves reached just to my elbow and then added 2” of 1x1 rib and bound off using a tubular bind off.

Cowl:

The most important part of course!
I picked up all the sts from the original cast on (112) and knit in 1x1 rib for 2.5” with size 8 needles. Every 2.5” I switched to a larger needle size (I used 8’s, 9’s, 10’s, and 10.5’s) and the cowl finished off at about 10”. I bound off with a tubular bind off. The tubular (or kitchener) bind off is the best finish I’ve found for 1x1 rib because it doesn’t give a ruffled edge. You could also use a standard “k2, slip first st over 2nd st” bind off, but I can never make that bind off loose enough.

To finish I just seamed up the underarms and wove in the ends. It’s really a very easy and fun sweater to knit, and I’ve already wore mine quite a bit!

Hope you found these notes helpful!

Francis

Ravelry Project Link
Pattern: Inspired by Francis Revisited
Mods are here

This was a great knit. Even though it's a sweater, it still became my "mindless knitting" project. Just basic stockinette with a little 1x1 rib and some shaping thrown in. I've already worn this a lot. It's really versatile and having the extra warmth around my neck from the cowl is perfect for chilly fall days.

I'd love to make this again someday with a really luxurious yarn, it's a simple enough pattern that a great yarn would really have a chance to shine. The yarn I used for this was Patons Classic Merino (bought before Patons changed the blend to what is essentially "misc wool") and it's holding up really nicely. As I mentioned when I started this project, the yarn was already knit up into a sweater that didn't turn out so well. After I frogged that sweater and washed the yarn, it went back very closely to its original state and appears to have survived the ordeal nicely.
Overall I'm very excited about this sweater and right now it's all I can do to stop myself from casting on for another sweater project. But Christmas presents must come first!

Monday, October 26, 2009

...

Naming knits. When I posted my about my latest design project last week you might have noticed that it didn't exactly have a name. "Design Project" doesn't count.

Anyway, I've been trying to come up with something creative, memorable, and relevant. Not necessarily the easiest thing. My main inspiration for the project came from a great movie, combined with some great yarn, and the concept of a creating something very textural and different than the usual lace shawl. After a few original ideas, I didn't end up finding a name from that inspiration.

Currently I'm thinking of naming the shawl after an English village, which will at least be somewhat related to a bit of my original inspiration (the movie/book was North and South in case you're curious)
After finding a few names I really like (even though they are completely random!) I decided it would be fun to post here and see if any of you have some input. I probably won't make a final decision until the test knit is finished but I'd love to hear what you all have to say!

The villages listed below are all located in Kent, England...and as I said, completely random choices. ;)

1. Bramling
2. Denstroude
3. Eynsford (pronounced Ainsford)
4. Fawkham
Let me know what you think!

Monday, October 19, 2009

Design Project

I finally have photos to share! (and yes, I do need a haircut)

When I first saw this skein of Berroco Ultra Alpaca Fine, I knew almost instantly what I wanted to do with it...and now a few sketches, swatches, and several thousand stitches later, this:

My goal was to create a light gauge ultra-textured shawl (click on the photos to see the detail)that could be easily wrapped around the neck like a scarf. A great accessory to wear with a sweater in the fall or to wear over a coat in the winter. In fact, you can even wear it over a sweater and under a coat; the shawl shape fits well under a pea coat (which is how I've been wearing it). Ravelry Project Link
Yarn: Berroco Ultra Alpaca Fine (great to knit with, and priced really well at about $10 for 433yds)
I'm currently in the process of completing the pattern and getting it test knit. I'm planning on having the pattern written for two different yarns, an alpaca fingering (the Berroco) and a merino fingering.

Monday, September 21, 2009

Handspun Shawl

This is my first FO with some of my handspun. I'm really happy with the way it turned out.

Ravelry Project Link
The yarn doesn't have much stitch definition, so the lace pattern is a little indistinct. It's supposed to look like a basketweave pattern.
I started this off as a simple stockinette shawl for a "mindless knitting" project. About halfway through I got bored and decided to add a lace border. I had to do quite a bit of re-working to the lace pattern to get it to fit with the increases, but eventually I got it figured out. I was excited about how the edging chart turned out too, it fits in perfectly with the basketweave.
Working with my handspun was a little nerve-wracking because of how thin and underspun the yarn was. One spot got so thin that I even considered frogging back to fix it. Hopefully the yarns I'm currently spinning will be better in that respect.
I have a skein of sportweight I have yet to blog about and I'm currently spinning up 4oz of merino top into some sockweight. I've already finished half of the singles, so I should have some more finished yarn within the next weeks. :)

Tuesday, September 8, 2009

FO: Sailor Socks

Ravelry Project Link

I began knitting these socks as a way to use my leftovers from the Featherweight Cardigan and a 185yd skein of Louet Gems that I purchased with apparently no forethought (what CAN you do with 185yds of fingering, besides mini fingerless gloves?). I blame the wool fumes.
It was a little interesting knitting with these two yarns. The Cascade Heritage is a tightly spun (as in, don't try to break it with your hands...ow) four-ply fingering weight. The Louet Gems is a very soft and fluffy two-ply. They aren't two yarns I'd normally put together, but I really didn't want to buy another skein of the Louet to make striped socks when I had something that work just fine. Now my stash is a little smaller, and I have a pair of socks that makes me smile.

One thing I don't like? The line of yarn running up the sides of the foot and leg from the stripes. It's a little uncomfortable to wear. But that's not enough to keep me from wearing these socks(and perhaps even making more?!).

Tuesday, September 1, 2009

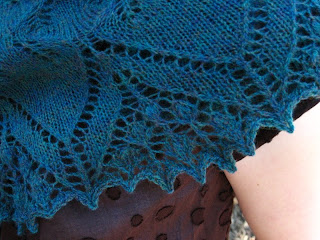
FO: Aeolian Shawl


Ravelry Project Link

Pattern: Alternative Narrow Edging for Aeolian (used the regular Aeolian Pattern and then this edging because it was shorter than the original and I was ready to be done knitting)
Pattern Size: Kind of did my own thing here:
Yucca Chart: 6 repeats
Transition Chart: 1 repeat
Agave Chart: 1 repeat
Edging: Alternate Edging
Center Back (from CO to tip) Measurement: 22.5"
I started this knit in April but I took several months off, so I only just finished it a few weeks back. I think the amount of stitches is what got me. The final BO took me almost 2 hours (though I do attribute some of that to the fact that I was watching Little Dorrit, and was probably knitting at a much slower speed than usual)

I love how the final piece looks, it's just gorgeous. I'm a little unhappy with the yarn that I used though (Knit Picks Shadow) because even though it's a fine yarn and the colour is great (I love heathers) it has a tendency to be "sticky", which leads to "felty" and with a piece that I put so much time into, I wish the yarn was higher quality.

Overall though, I'm happy. :)

Monday, July 13, 2009

FO: Featherweight Cardigan


I really enjoyed knitting this sweater and love wearing it! Such a simple and cute pattern. I'll probably make this again down the road. I knit the cardi in fingering weight (calls for lace) and I think it worked really well. If I make the "sister cardigan" Whisper, I'll probably use laceweight.

On the yarn, Cascade calls this colour "snow" it would probably be more appropriately termed "butter". ;) Other than that, a great yarn (and priced really well too).

Another note on the pattern, I sized my cardi down to fit me (33"), which meant subtracting about 2.5-3" worth of total stitches from the pattern. The pattern doesn't include a schematic, which I found frustrating since it would have been helpful while I was trying to figure out how many increases to do. Other than that though, the pattern is well written and easy to follow. :)